Statistical Orientation Lab
18 Aug 2016Welcome to Statistical Orientation Lab
Technical Setup
Unix and Rice Computing Resources
Unix (Uniplexed Information and Computing System) is a family of multitasking, multiuser computer operating systems that derive from the original AT&T Unix, developed in the 1970s at Bell Labs.
Learning to use Unix is a necessity for modern statistics. Graduate students should learn to use Unix no matter what operating system they use. Luckily, all Rice statistics graduate students have access to several servers. So why do we need Unix and servers?
- Large computing jobs
- 5GB of free storage
- File movement
- Security
- Interoperability
Note: In order to access Rice computing resources or mount your U: Drive from off campus you will need to use a VPN. Instructions can be found here.
The U-Drive
- Each Rice graduate student is provided with 5GB of storage on the university servers.
- An easy way to access your U: Drive is to mount a network drive. Once mounted, the U: Drive can be found and used like any other hard drive (as long as internet access is maintained).
- To connect to your U: Drive, follow the instructions for your OS below:
Exercise One: Mounting U Drive
- Follow instructions for your OS given above
- Find your U Drive and explore it.
CLEAR (Curricular Linux Environment At Rice)
The CLEAR systems are available to all students to help with coursework computations. Research computation should be done on other faster servers.
SSH stands for “Secure SHell”. It allows you to securely log onto a remote system (like CLEAR) to utilize its resources. Logging into CLEAR is done in different ways depending on your operating system. CLEAR has several aliases so that you can sign into different ones to distribute your impact. The aliases are
Login Steps
Be sure to connected to the internet.
- Mactintosh
- Open terminal
- In terminal type
[ym11@myMac ~]$ssh<myNetID>@<alias>.clear.rice.edu
- Replace
with your Rice NetID and with one of the alias options above. -
Example: My NetID is ym11, and if I pick the water alias I would enter: ym11@water.clear.rice.edu.
- Linux
- Open the Terminal (This can be found by searching for Terminal).
- Follow the Macintosh instructions above.
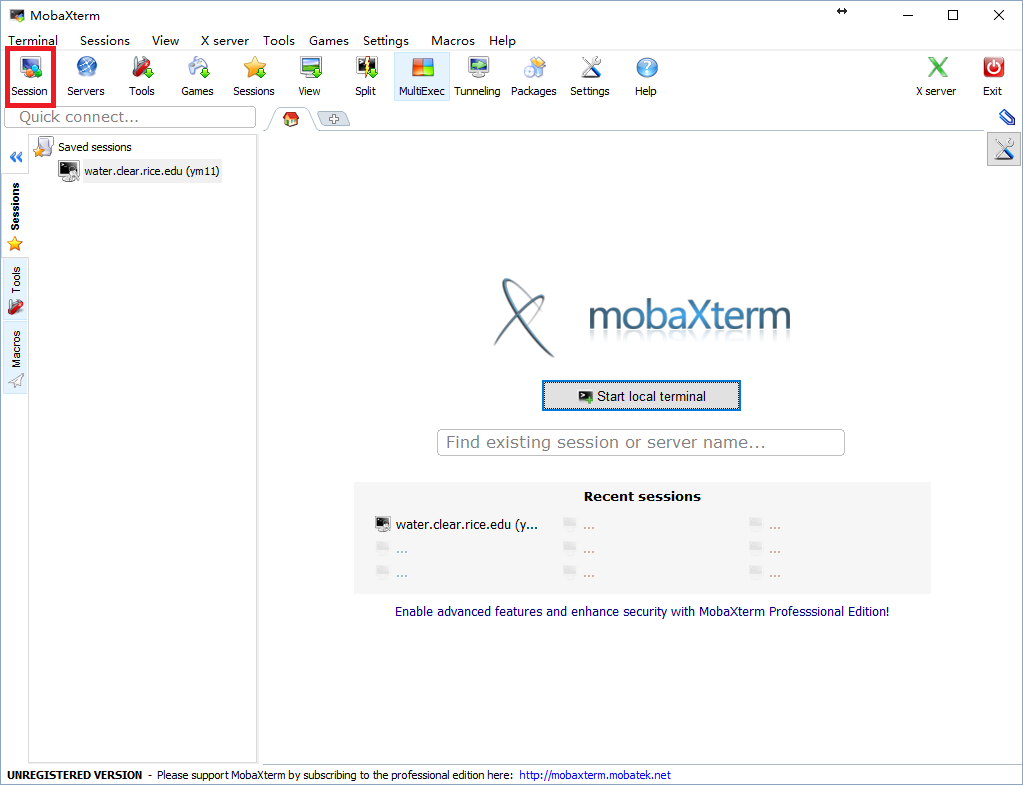
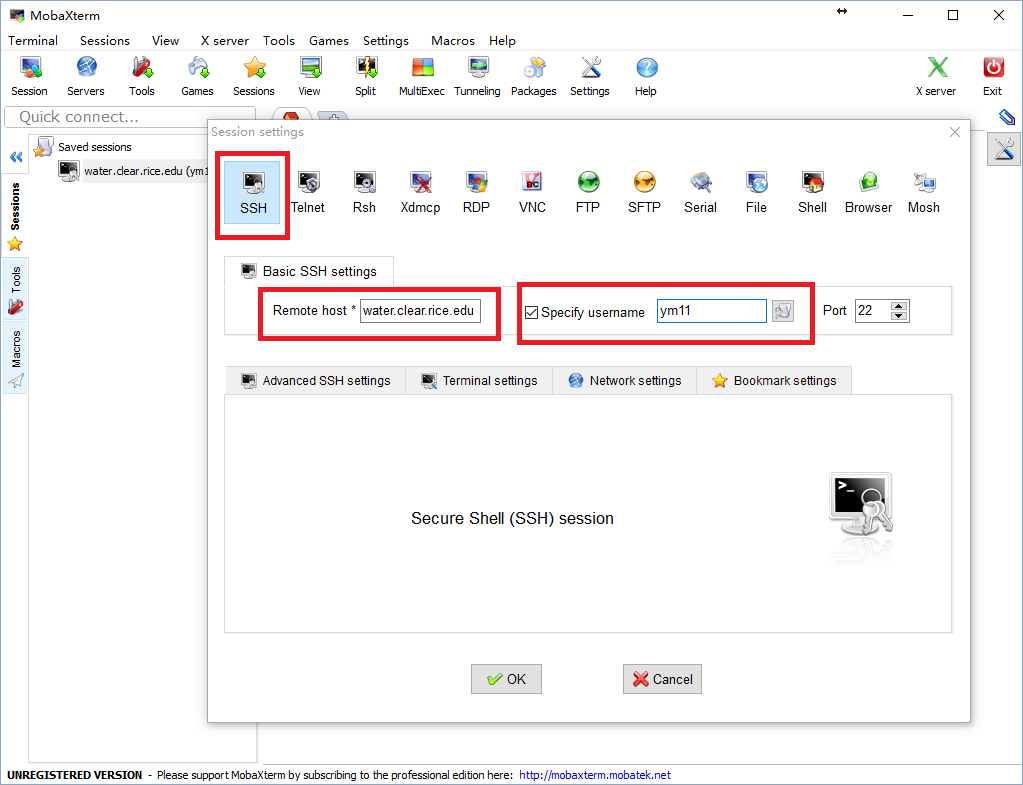
- Windows
- Download the MobaXterm via this link.
- Click Session and then choose ssh . Fill in one of the four aliases above such as water.clear.rice.edu in the Remote host and your netid in Specify username.
- Click on one of the saved sessions.
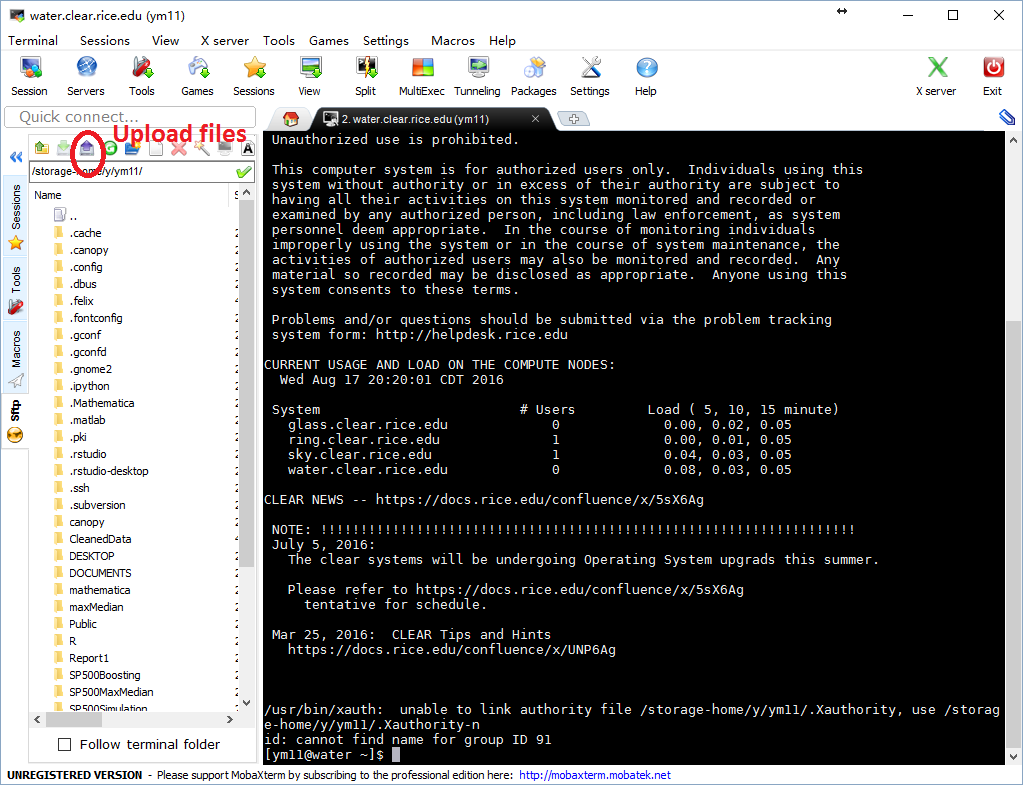
Moving files between your computer and CLEAR
- Your U: drive home folder is your home directory when you login to CLEAR. Anything you drop there will be accessible to you.
- Use sftp feature offered by the MobaXterm.
- Use sftp command in unix. Reference.
Unix Tutorial
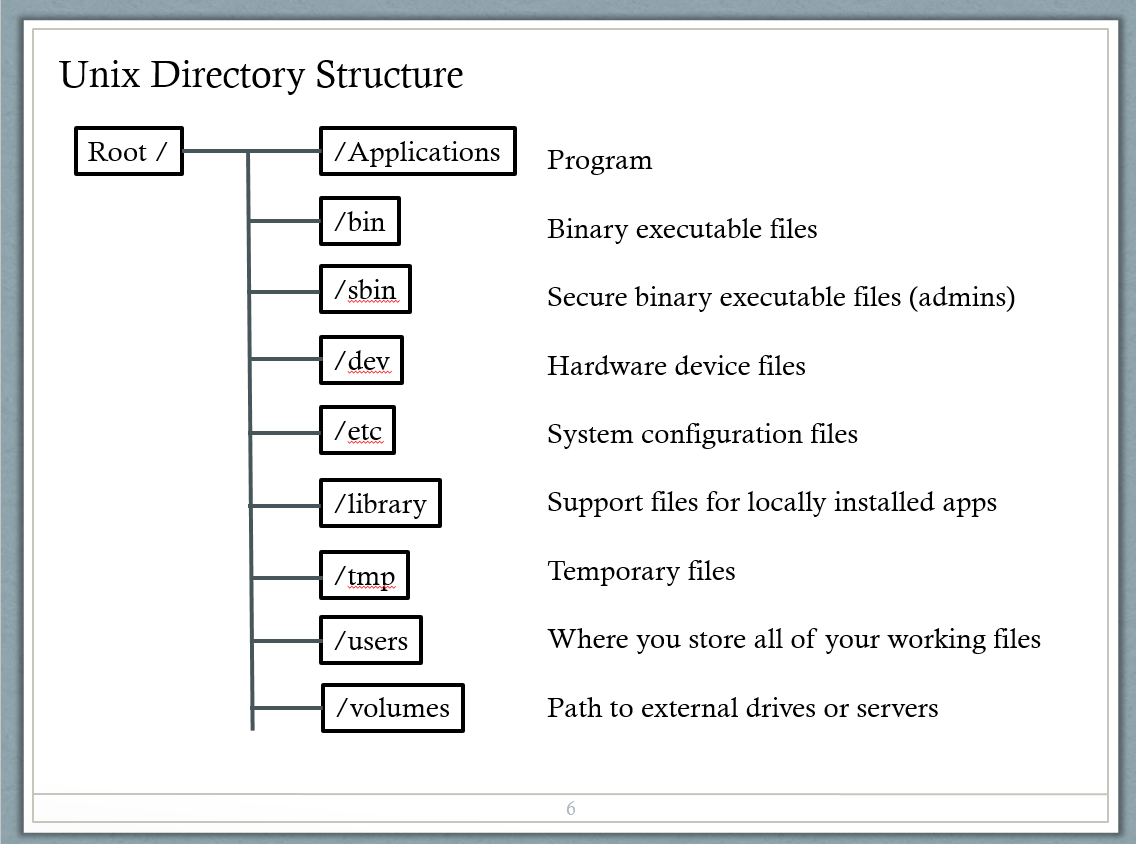
Unix Directory Structure
Navigating the UNIX File System
| Code | Function |
|---|---|
ls |
List directory files |
cd |
Change Directory |
cd~ |
Go to home directory in /user |
cd./ |
Move down one directory |
pwd |
Show current directory |
df -h |
Disk usage/storage |
Up Arrow |
Cycle through previous commands |
ps |
List current process |
kill |
End current process |
mdfind |
Find a file on the computer |
clear or Ctrl + L |
Clear the screen |
Executing Programs
- If the program is already in bin or sbin folder,
[ym11@water ~]$top
- Otherwise execute the program using its full directory
[ym11@water ~]$./bin/top
- By default the program will run in foreground. To run a program in the background use the & command.
[ym11@water ~]$./bin/top &
or
[ym11@water ~]$top &
- To view all progresses running in the background.
[ym11@water ~]$ps
- To stop a process via killing its process ID
[ym11@water ~]$kill 1122
Manipulating Files and Directories
| Code | Function |
|---|---|
| touch file | Create a new file |
| more file | Begin listing the contents of file |
| less file | Another program to list contents of file |
| head file | List first x number of lines from file |
| tail file | List last x number of lines from file |
| rm file | Remove a file |
| cp file directory | Copy file to location |
| mv file1 file2 | Move file or rename file |
| mkdir directory | Make a new directory |
Piping commands and input/output
A powerful aspect of UNIX is the ability to redirect output and combine multiple commands using the pipe character |.
| Code | Function |
|---|---|
| Command > file | Output text to file |
| Command » file | Append output to file |
| Command < file | Input file 1 into the comamnd |
| Command1|command2 | Pipe output of command 1 to command2 |
| Cat file1 file2 file3 >bigfile | Concatenate the output of files 1~3 into bigfile |
Example
Find history commands that contain the ls.
[ym11@water ~]$history|grep ls
File Permissions
To find the permissions for files in a directory type, use ls -l.

Change file permission.
- Add read, write and execute permissions for current user.
[ym11@water ~]$chmod +rwx file.txt
- Remove read and write permissions for current user.
[ym11@water ~]$chmod -rx file.txt
- Grand all permissions to all user
[ym11@water ~]$chmod a+wrx file.txt
or
[ym11@water ~]$chmod 777 file.txt
In case you need administrator permission to access or change a file or directory, you might need the sudo (super user do?) command.
[ym11@water ~]$sudo cp file.text ../Downloads/
Additional Commands
| Code | Function | Example |
|---|---|---|
man |
Look up for documentation | man cp |
tar |
Compress or decompress a directory | Compress: tar - czf file.tar, Decompress: tar - xzf file.tar |
Install and compile software via make
https://code.google.com/archive/p/bedtools/downloads
More references for Unix Command
Thanks to Jie Yang for helping preparing a detailed tutorial for this section! Thank you!!
LaTeX
LaTeX is a type-setting system for preparing documents, and is the standard used in almost all technical disciplines. It permits a high level of control over the structure of presentations and text documents, while also allowing the user to enter mathematical symbols.
Learning how to use LaTeX is necessary for research publications, with it you can make elegant documents which can be edited quickly. Graduate students should learn how to use LaTeX as quickly as possible. It is not formally required in all classes, but you will be handicapping yourself if you do not learn how to use it quickly.
Install LaTeX
LaTeX is a language and not an editor, or notepad: such as word, so how Interact with LaTeX you will be dictated by what implementation and what editor you use.
You first need to download and install the TeX distribution appropriate for your operating system. These can be obtained from the following links:
- Unix & Linux: TeX Live, Kile.
- Mac OS X: TeXWorks.
- Windows: Kile, Follow the installing tutorial, The file in that tutorial can be doneloaded via this Dropbox link.
Example of Compiling a LaTeX Document Via Kile
The backslash operator is used to denote when LaTeX specific syntax is being entered, and this is used to specify controls sequences (such as \begin{equation}), and also to enter new characters (such as \pi or \newline). % is used to specify comments.
If you want to use a protected character as a text character, you need to precede it with a backslash. For example, \ would give you a single backslash and would not start a control sequence, or \% would give you the character % without beginning a comment.
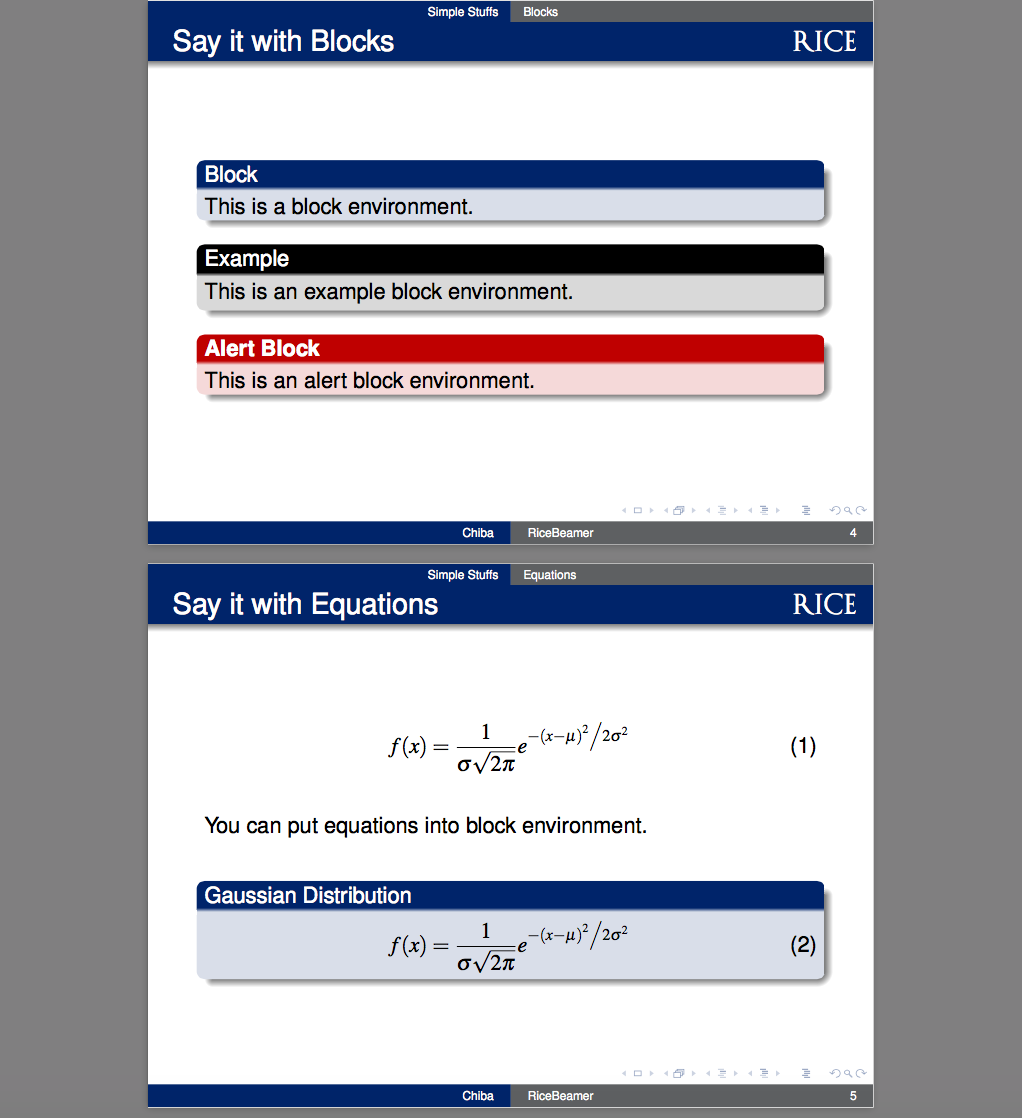
Beamer
Beamer is a package in LaTeX used to create .pdf presentations. It has the same utilities as the general LaTeX documents do, but has features for creating slides. In the template zip download there is a folder called RiceBeamer, which contains an example Beamer presentation (obtained from former Rice student Daina Chiba). Open up the .tex file in your LaTeX editor, and compile the file the same way you did previously.
You should get something similar to:
The syntax for Beamer documents is very similar, but there are certain properties which have to be handled differently. For instance, you need to specify the beginning and ends of frames using the control sequence
\begin{frame}
		...
		...

\end{frame}
You can edit these templates as a basis for how to construct documents until you learn how to compose the documents you would like, or you can download LaTeX templates online which you feel are more appropriate.
LyX
Dealing with LaTeX can be sort of difficult, particularly when you’re first starting out, and the pace at which you can create documents might not be appropriate for particular tasks (such as taking notes, or writing up homework problems). Fortunately, there are a number of editors designed to streamline the process. The most commonly used of these editors being LyX.
LyX is like any other editor in that you need to have the distribution installed on your system for it to work appropriately, but it’s much easier to create documents without knowing all of the LaTeX syntax.
Install LyX
After downloading and installing Lyx, open up the application and create a new document.
- Windows. Dropbox
- Mac OS X, If not working, please try to install software for Older System.
- Linux. Please follow the instruction below:
[ym11@water ~]$ sudo add-apt-repository ppa:lyx-devel/release
[ym11@water ~]$ sudo apt-get update
[ym11@water ~]$ sudo apt-get install lyx
If you click on the Insert tab, a few options will come up which allow you to manually enter LaTeX without inputting the code directly. Clicking on the Insert->Math option or Ctrl + M combination through the keyboard will give you something similar to the following:
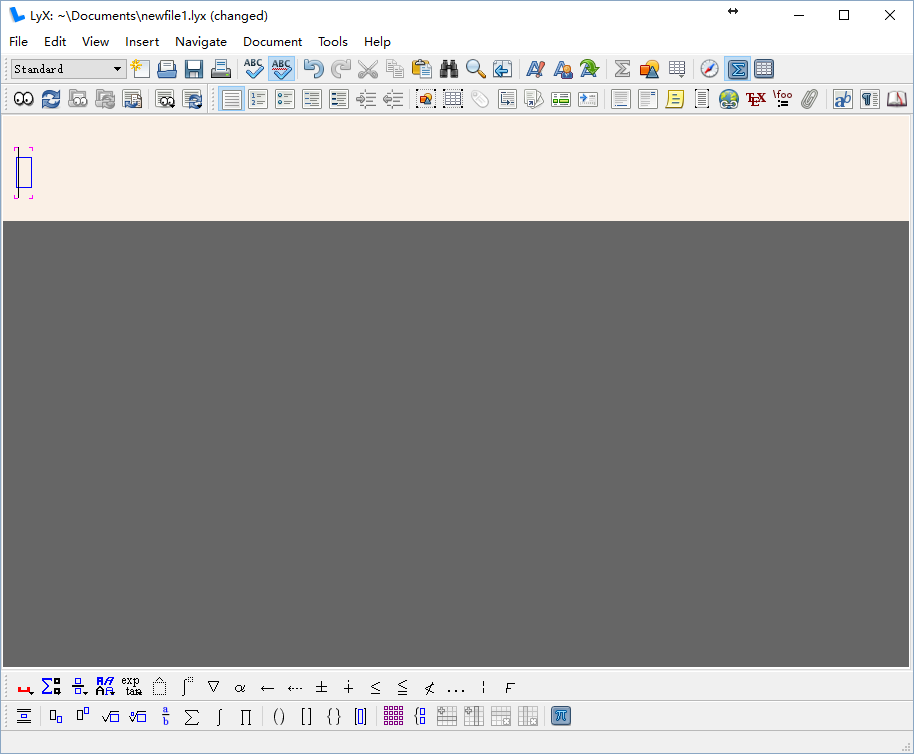
This opens up a blue space, and a symbol menu at the bottom. You can click on this symbol menu to input symbols, and click outside of the blue square to begin typing normal text again.

Within the math entry section in LyX, you can enter a standard LaTeX control sequence and LyX will convert them to symbols for you:
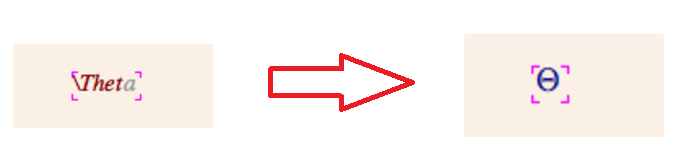
In this sense LyX is sort of a WYSWYG (pronounced “wiz-ee-wig”) or “what you see is what you get” editor.
It’s important to remember that LyX documents are not .tex files, and if you are collaborating with someone who doesn’t use LyX you will need to convert the LyX file to a .tex file. This can be done via File -> Export -> LaTeX (pdflatex).
LaTeX and LyX Useful Resources
There are a couple of resources that can be useful for learning how to use LaTeX:
- Detexify : Allows you to draw mathematical symbols, and then the site will try to suggest the Tex code for that symbol.
-
LaTeX Templates : Contains a number of templates for various types of documents.
-
LaTeX Wiki : Wikia page for LaTeX.
- LyX Templates : Contains templates for LyX documents.
Exercise Three: Compile the two documents in the zip file
Thank you Ryan Warnick for preparing this section!!
Statistical Computing
R is a programming language and software environment for statistical computing and graphics . More importantly, R will be used a lot for some courses at Rice. While you will likely have lots of practice in your courses, picking it up quickly will be extremely helpful.
It’s free, open source, widely used among statisticians and data miners for developing statistical software and data analysis.
Installing R
The files are downloaded via CRAN mirrors, with the closest one being in Dallas, but it doesn’t really matter which one you choose, they’re just designed to take the load off of the servers at the R-project.
Once you choose a mirror, you’ll find a link like the one below, click the one appropriate to your OS.

Windows
- After clicking the “Download R for Windows” above, you then want to click the “base” link.
- Right-click on Download R 3.3.1 for Windows, and just save the .exe to your desktop (or wherever you want)
- Double click on the .exe, and follow the instructions.
- Choose the default “User” installation and don’t worry about “customizing startup options”
Mac
- After clicking the “Download R for (Mac) OS X, you want to choose the correct download for your OS.
- R-3.3.1.pkg is for Mavericks, while R-3.3.1-snowleopard.pkg is for Snow leopard.
- Open the .pkg file, and follow the instructions.
- Choose the defaults and do not worry about “customizing startup options”
The current version of R is 3.3.1, and you will need to update R as new releases come out.
Installing R-Studio
RStudio is a free and open-source integrated development environment (IDE) for R. You can download it at this link. Choose “Download RStudio Desktop” (with free license), then choose the correct OS download.
Use RStudio / R
The *.R file below contains a introduction to the functionalities of R. The *.txt and *.csv files will be needed as well. Download all three and save them in the SAME folder.
Once you’ve opened your RStudio, run the command
setwd("location/nameofyourfolder")
Alternatively, you can find your folder in the “file” window and select “set working directory”. This will set where R works from, saving any output files and looking for any input data.
The script (Thanks to Kate!) will run through basics, importing data, basic data exploration, intro to plotting/graphics, and packages.
Like any language, it will take some time to be familiar with the commands and environment, enjoy!
Files downloadable here: R_Tutorial.R, example.csv, titanic.txt
Reproducible Homework
Since we know R and LaTeX, we will combine them so that you can add R code in lyx or write mathematical symbols in R.
RMarkdown and knitr are two literate programming tools that can tangle R and LaTeX.
Markdown is simple and fast, not very customizable, but makes a clean looking report (which is sometimes all you need).
knitr is extremely dynamic, allows for large projects easily with features like caching and multiple input languages.
knitr
knitr is an engine for dynamic report generation with R. In order to using knitr in R: Setup Start by running the following commands in the console of RStudio:
install.packages(c("knitr", "ggplot2"))
require(knitr)
require(ggplot2)
Then Select “Tools” and then choose “global options”. Select “Sweave” and at the top of the page switch the “Weave Rnw files using” dropdown menu to knitr. Then you can select “File”, choose “New file” and then create “R sweave”.
Note: To directly write in Rnw file, you may need to know how to write articles in LaTeX.
In order to using knitr in Lyx:
It’s very simple and you can find it at http://yihui.name/knitr/demo/lyx/. Select “Document”, choose “Settings” and then select “Modules”.
Add Rnw(knitr) from avaliable modules and install knitr in R; then you are done.
You can play around with knitr by compiling both two files below.
To compile Rnw files, click “Compile PDF” in Rstudio when you open the rnw file.
To compile lyx files, click “View” or Ctrl+R.
You will find more information at http://yihui.name/knitr/options/.
Another thing is that you have to tell LyX where is Rscript (add the path to PATH prefix):
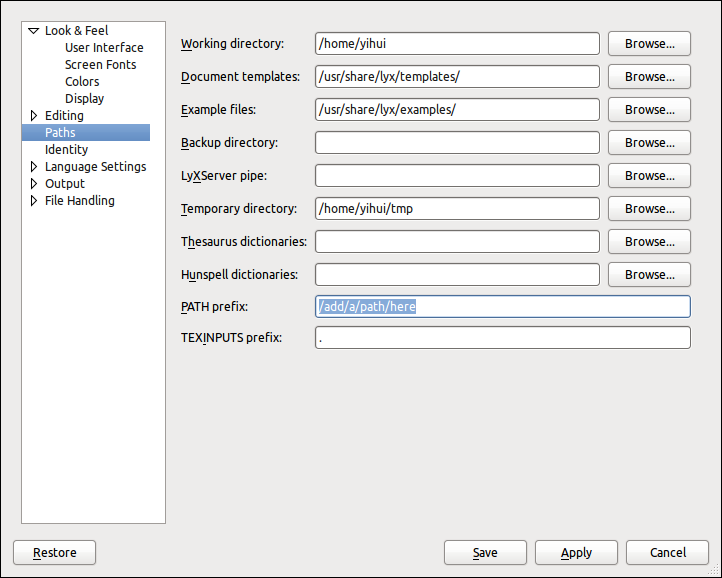
then reconfigure LyX. You now can get the path to Rscript by executing this in R:
Files downloadable here: Knitrtesting.rnw, Knitrtesting.lyx
RMarkdown
RMarkdown is a lightweight text markup language with R commands.
If you are not familiar with LaTeX, Markdown should be much easier to work with. The syntax is designed to mimic plain-text email.
Setup Run the following command in your RStudio console:
install.packages("rmarkdown")
Download the below .txt and copy/paste it in to an empty RStudio editor and save it as Markdown_example.Rmd . Similar to last time, note the file extension.
Once the file has been saved as an .Rmd, RStudio gives the option to “Knit HTML”.
In the drop-down menu of that button, note that there are two other options, “Knit PDF” and “Knit Word”.
Useful Links:
File downloadable here: Markdown_example.txt
As a quick note about R Markdown, you can use it to produce slide presentations as well. Details can be found at http://slidify.org/.